Today, I had a time of it.
My wife’s HP Pavilion has been a bit sketchy in the plug department due to the fact that the cord is kicked, tweaked and accidentally pulled out often. However, sketchy became broken after she pushed the plug housing into the innards of the laptop. We have two HP’s and they both have had, or are still having, issues with the plug.
I did some research to find out the deal and as it turns out, this is a common issue with the HP’s. I kept on with the research looking for a way to fix it. What I found was that I needed to disassemble the laptop in order to either repair or replace the plug. So, back to research in order to find a site that would help me do the deed. I found very little in the way of disassembling the HP Pavilion.
Aside from a site in German, I found nothing specific to the ZE series.
Now, I can barely speak my native tongue, let alone German, so I did a Google Translation from German to English on that site and used the pictures to muddle my way through the task.
Since I found nothing out there for this effort (in English), I am posting my own instructions to disassemble an HP Pavilion ZE5500 laptop.
WARNING
I take no responsibilities for any harm that may befall, you, your laptop, your clothes, your home, your girlfriend/wife/toy, your first born, your pet or anything you can think of for using the information found on this post.
You’ve Been Warned!
So let’s get to it, shall we?
In a nutshell, I needed to be able to repair or replace the plug so I had to remove the motherboard.
In order to do that we need to disassemble in the following order, battery (no juice while working), screen, keyboard, top, miscellaneous and finally the motherboard.
Advice: Label everything.
Battery
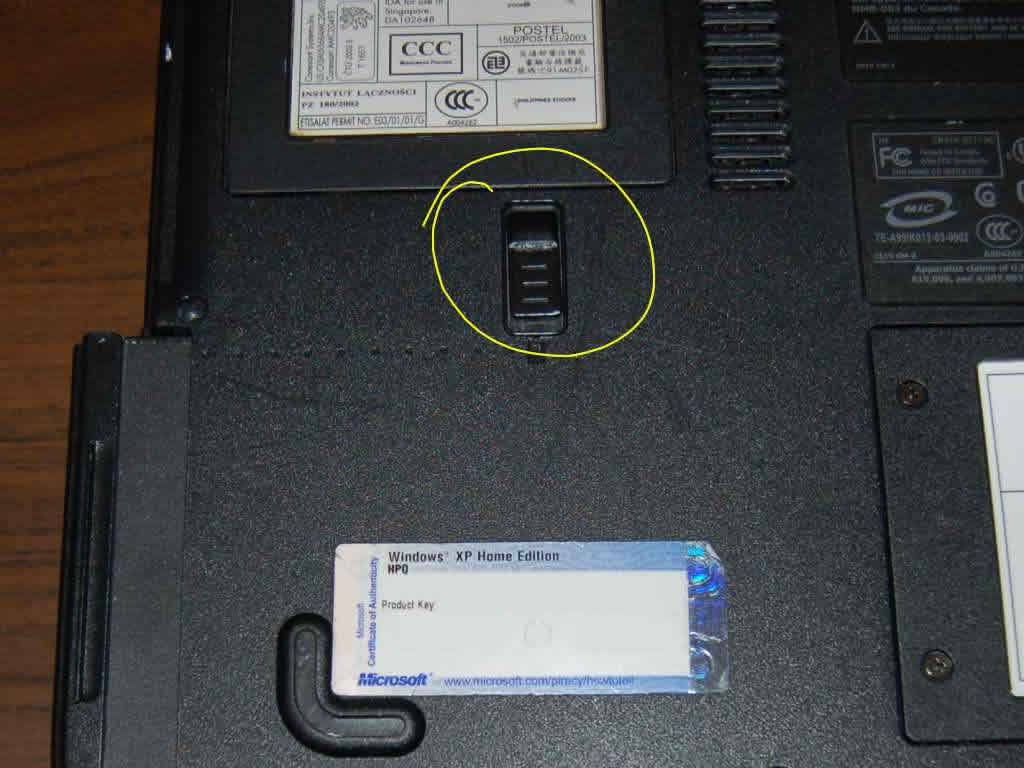
It should go without saying, but here you can see how to remove the battery.
Screen
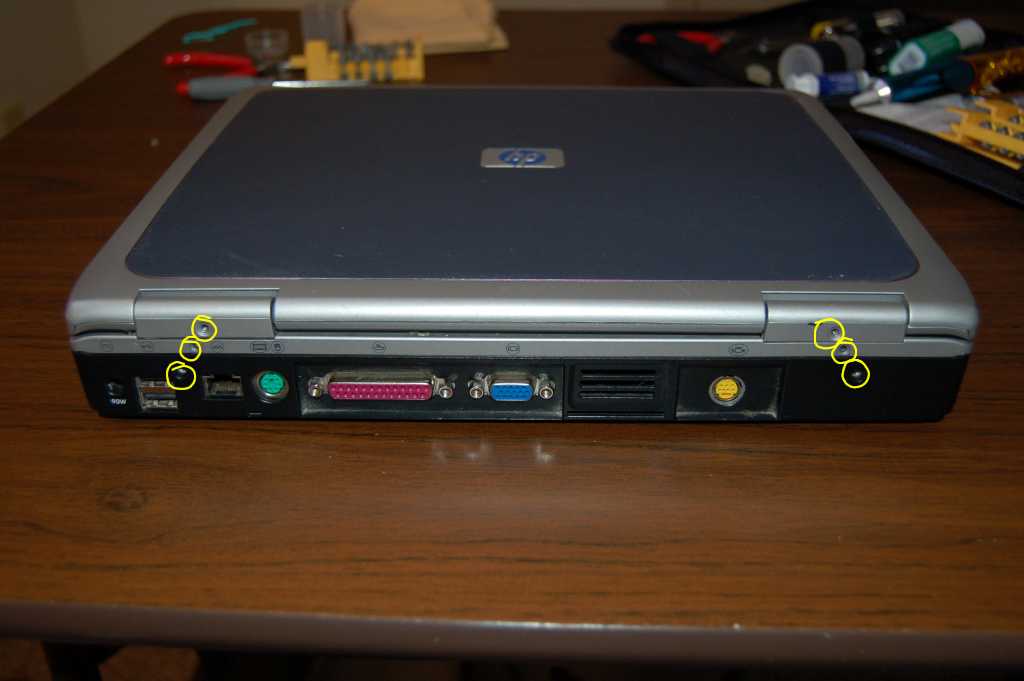
Start by removing the 6 screws from the rear of the unit.
Here you will need one or possibly two screw drivers to remove the ‘screen dashboard’. Gently wedge the screwdriver tip under the sleeve covering the screen hinge and lift. Do this to both sides until the ‘screen dashboard’ lifts enough to get your fingers under it. This ‘dashboard’ is only clipped into place, once the screws from the previous step are removed.
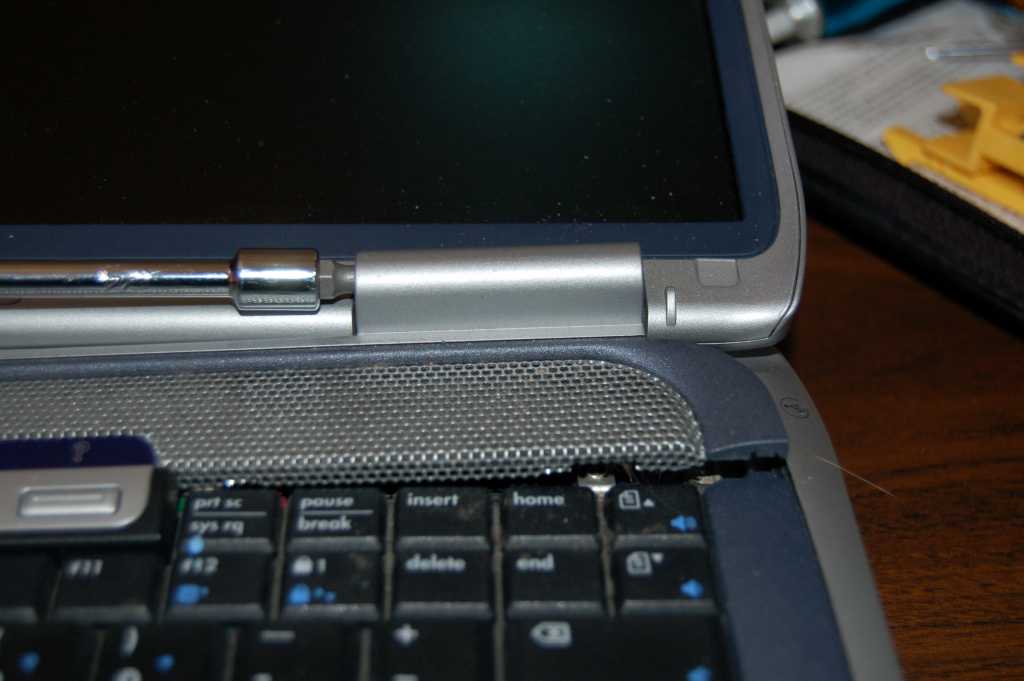

Then just unplug the ‘dashboard’.
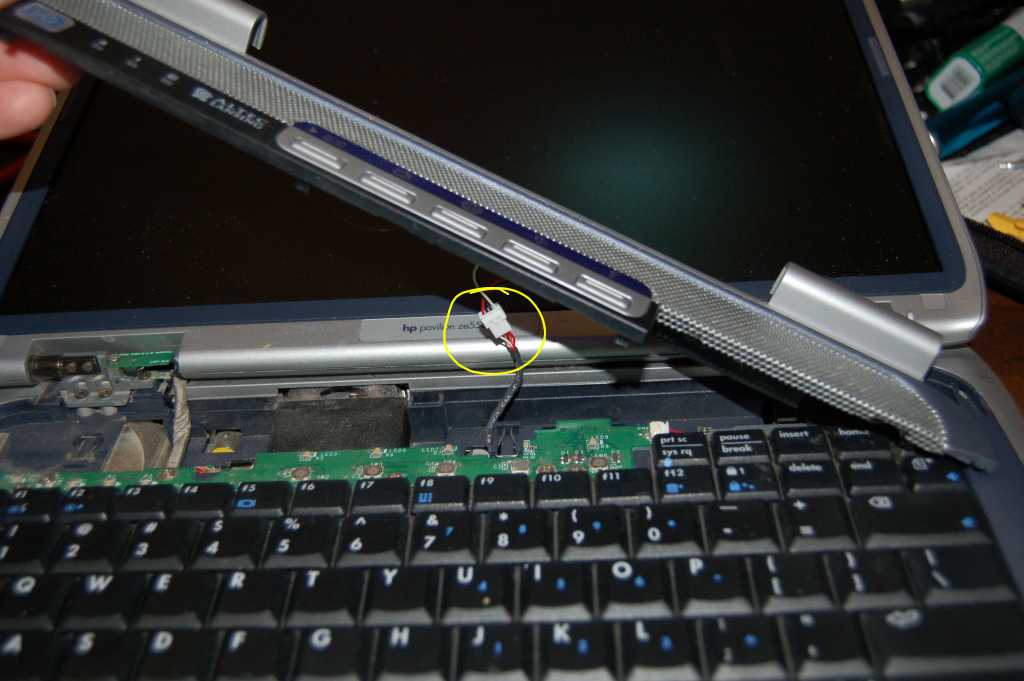
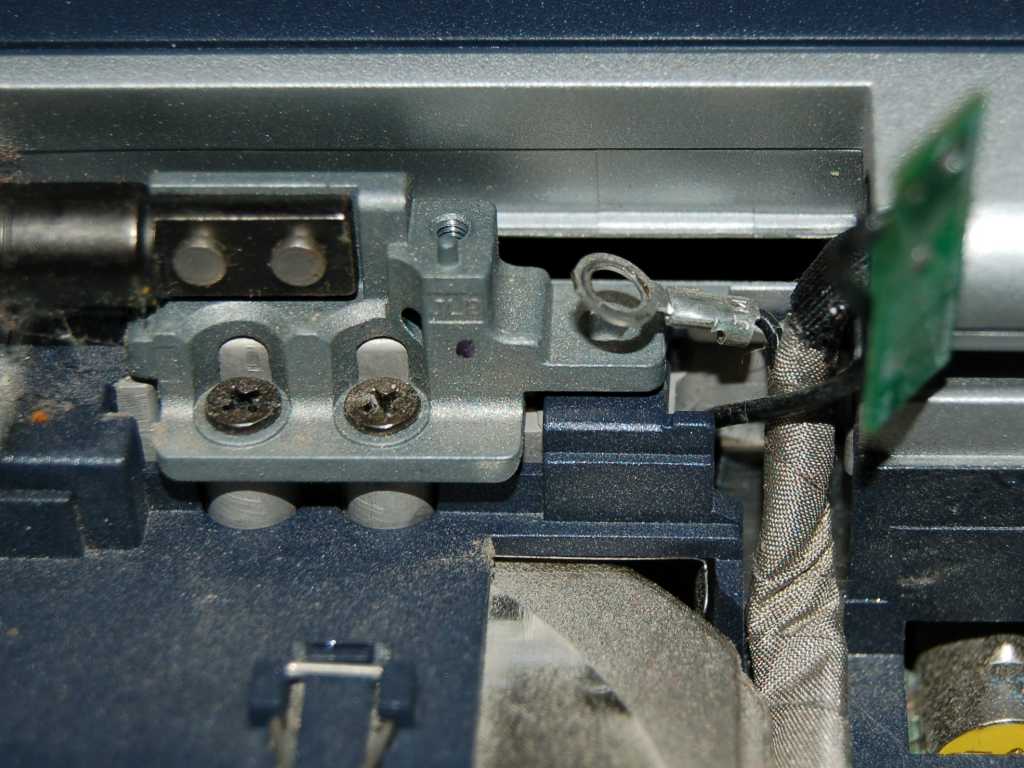
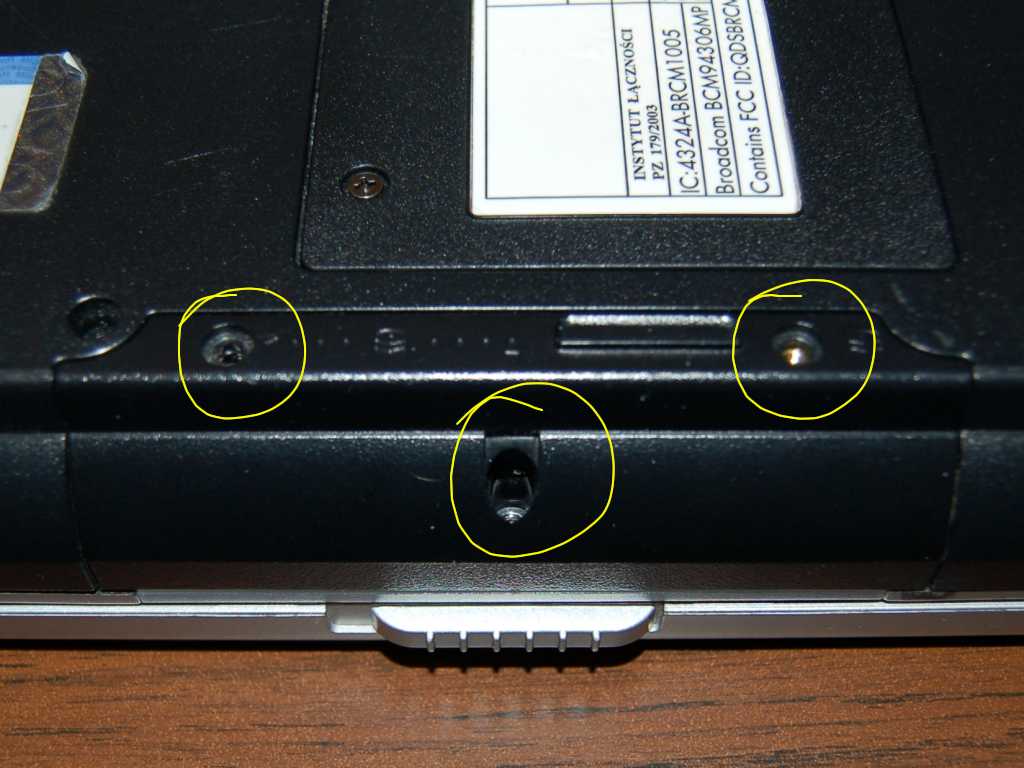
Now that the hinges are revealed, we can see that each hinge has 4 screws. Remove all eight screws to remove the screen (the screen will fall off, so be prepared and/or prop it up before removing all the screws).
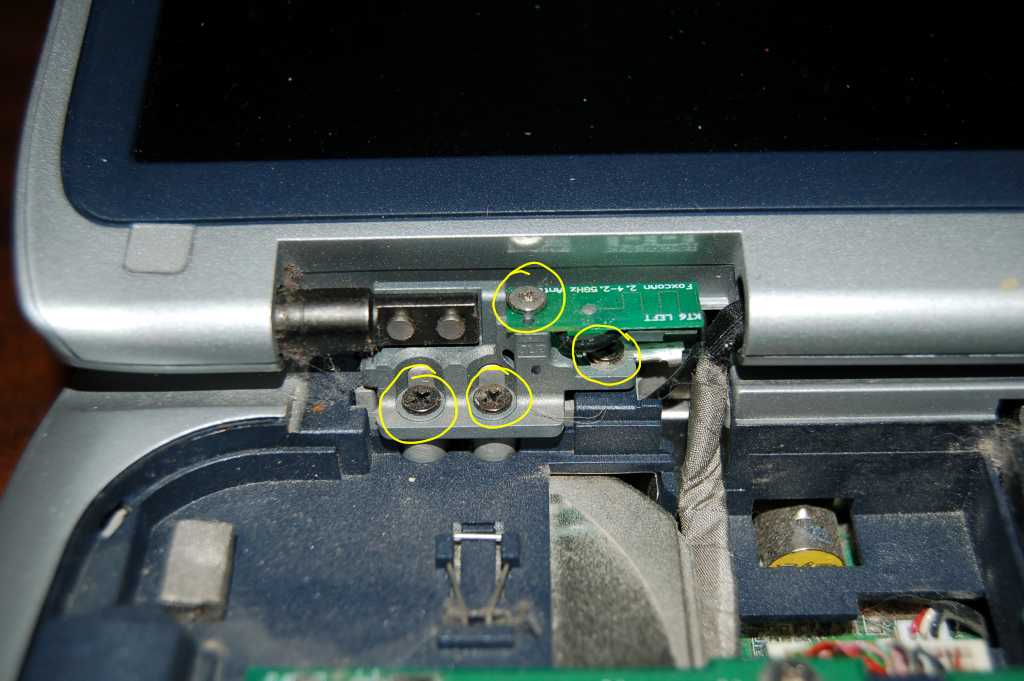
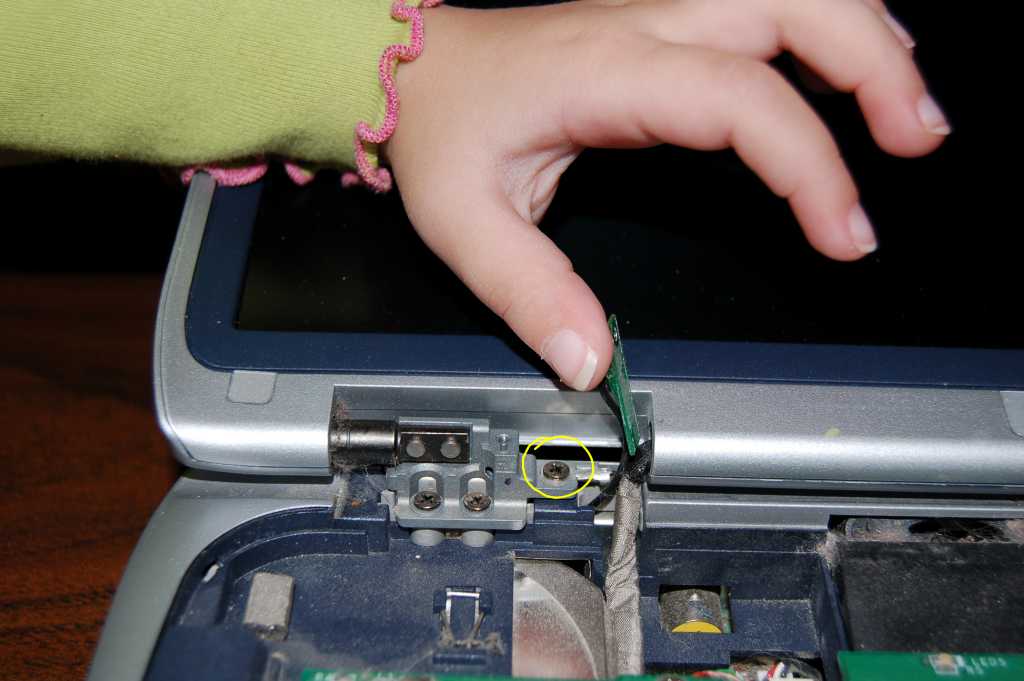
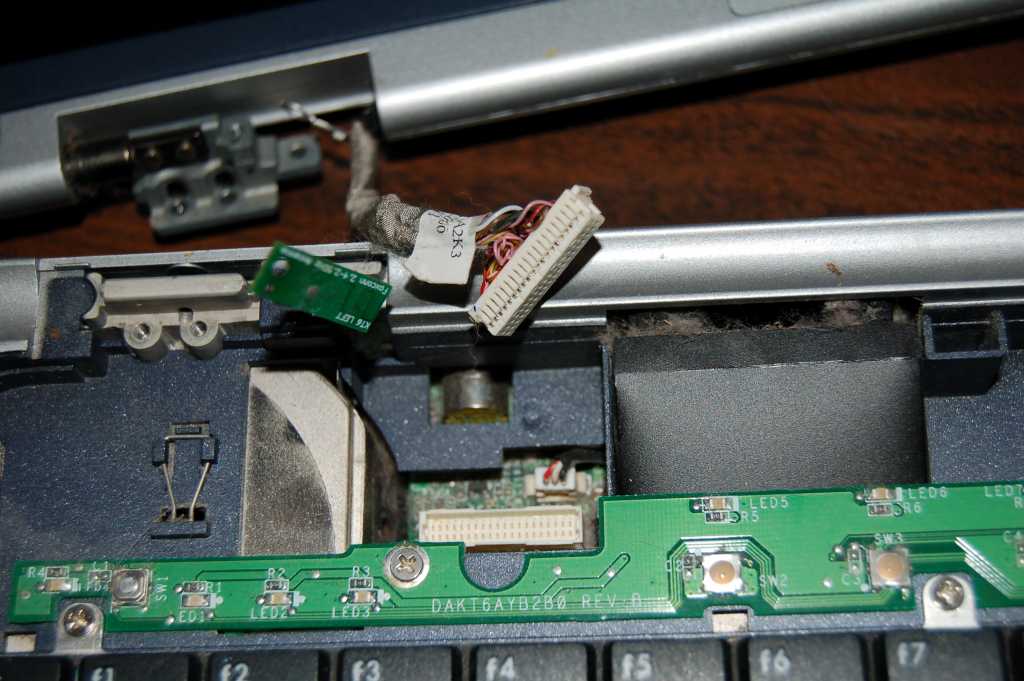
Thanks to my daughter, we get a better shot of the 4th screw as she pushes the wi-fi antenna out of the way.
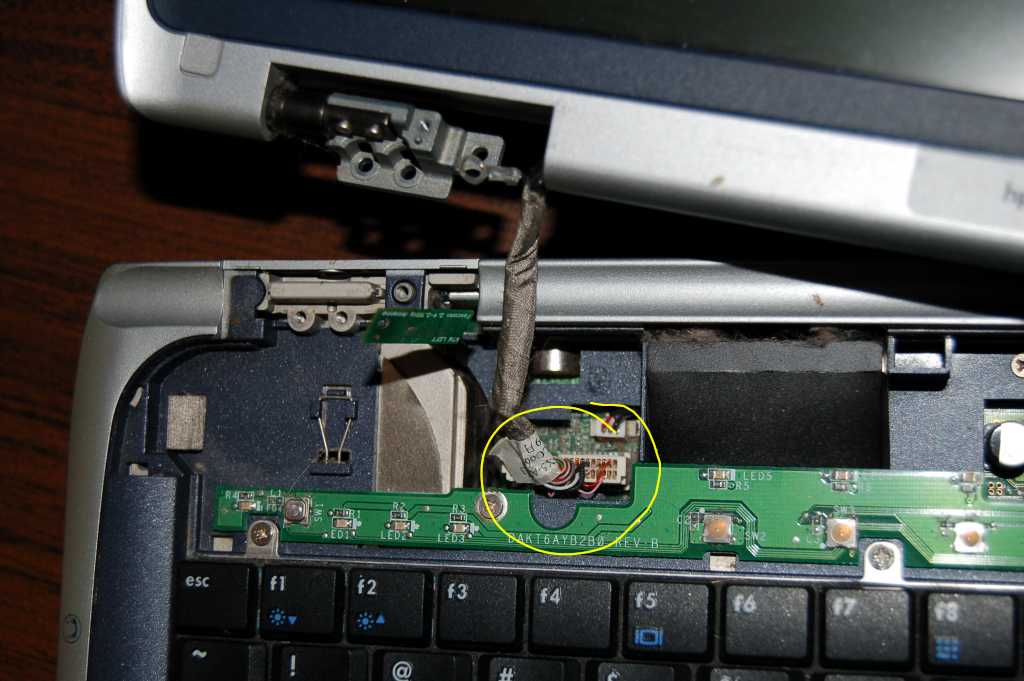
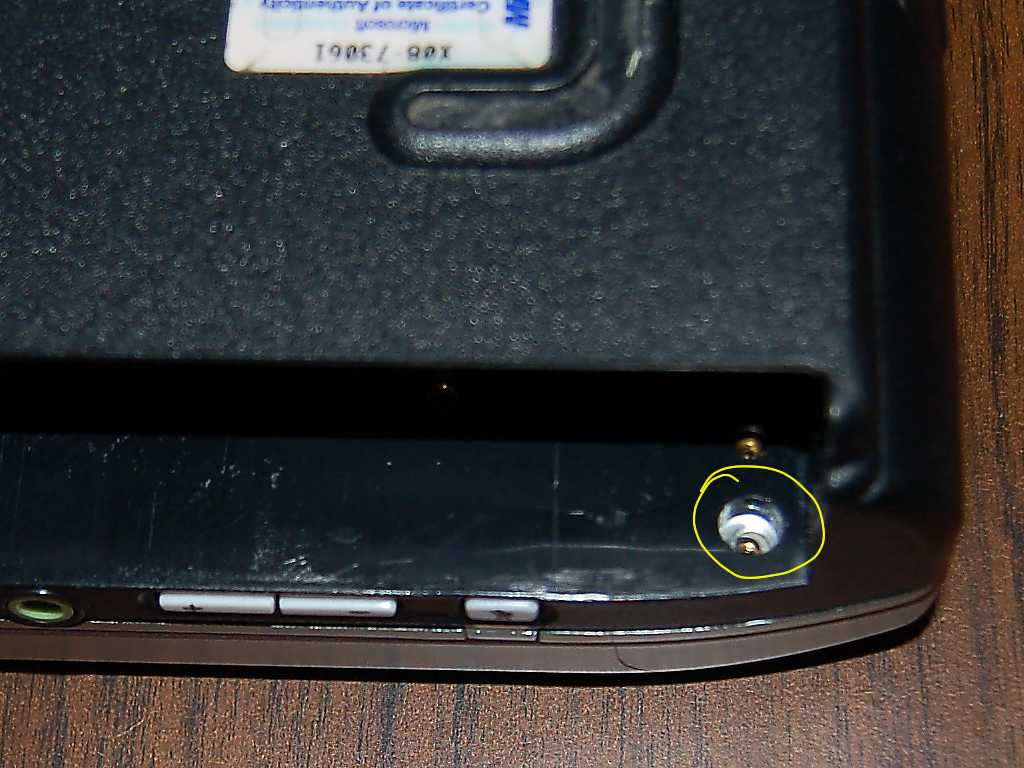
Only on the left side, there is what appears to be a ground wire.
Don’t forget to detach the head from the body.
Keyboard
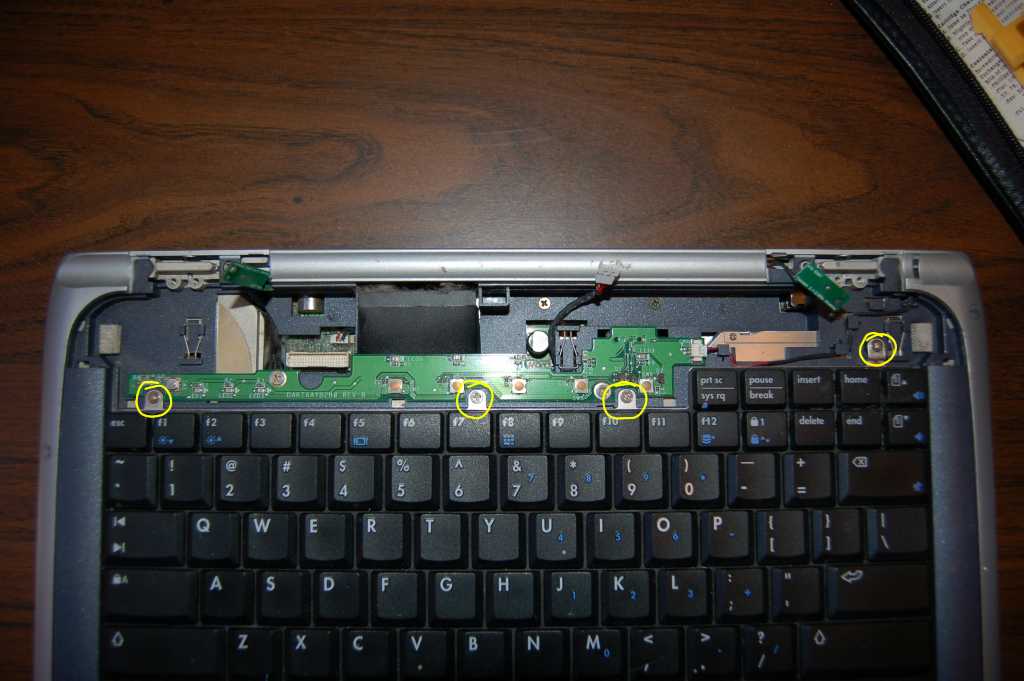
Moving on, we can see the 4 screws needed to remove the keyboard.
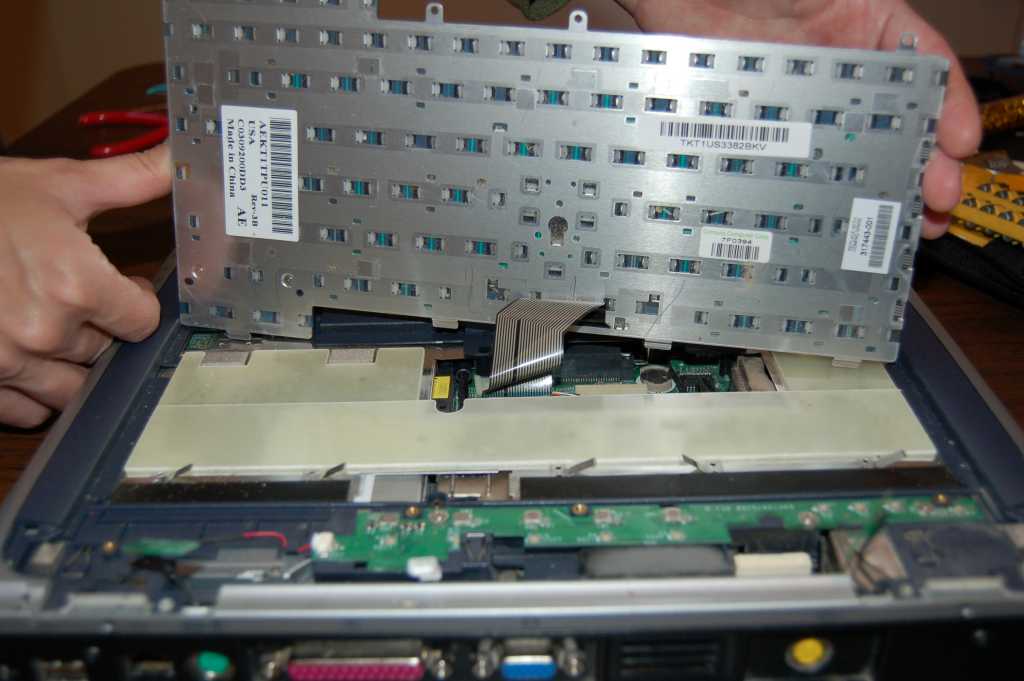
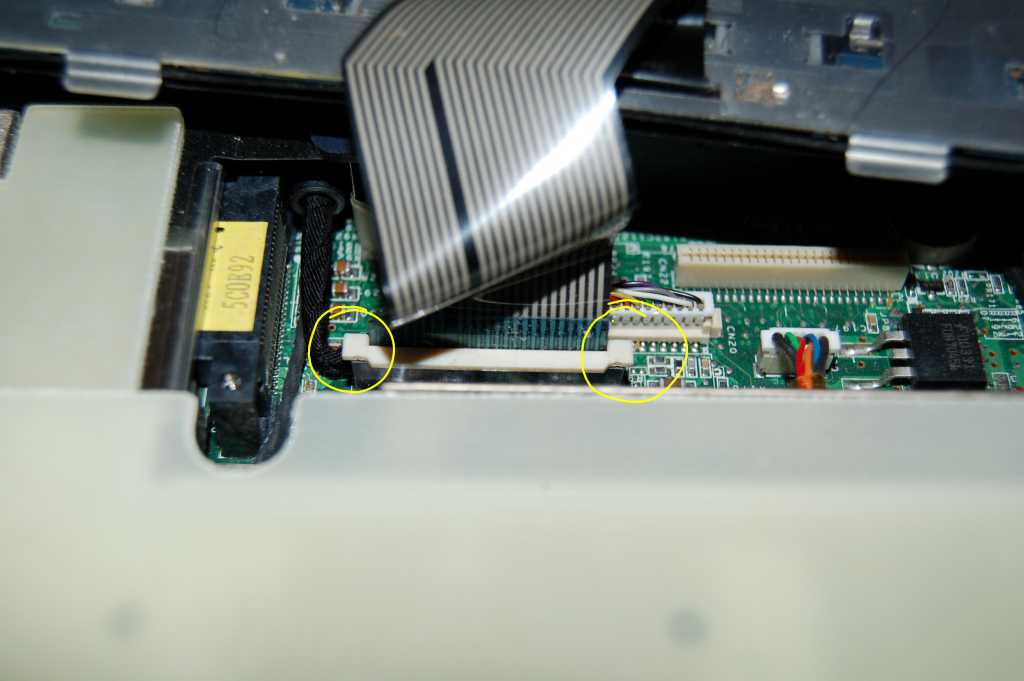
To remove the keyboard ribbon from the mother board, lift up on either side of the clip with a fingernail. The ribbon will most likely pop right out.
Top
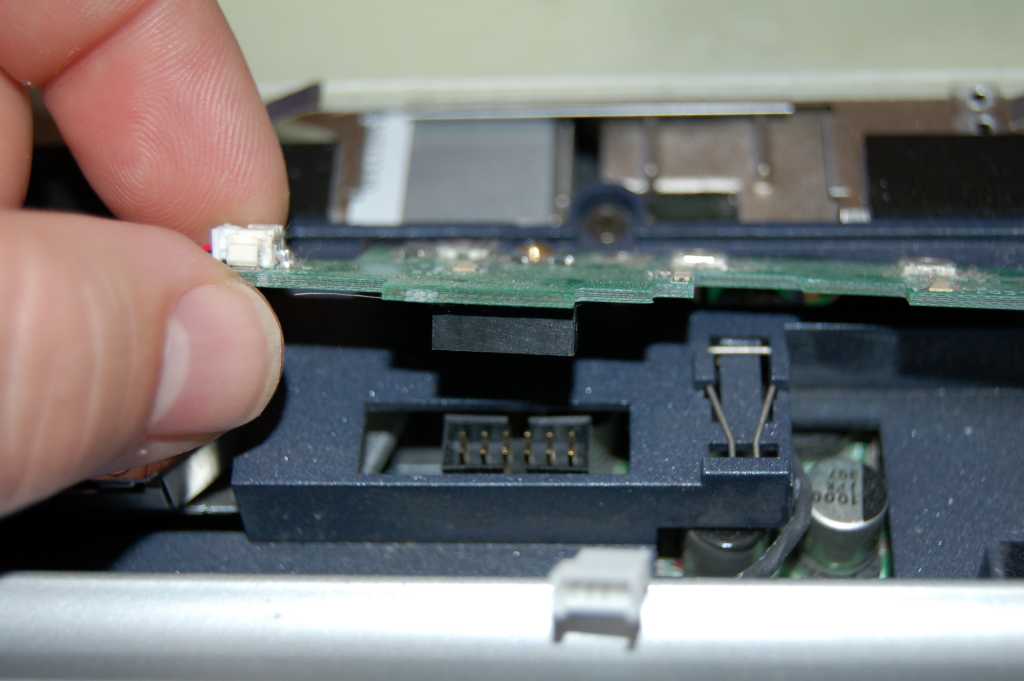
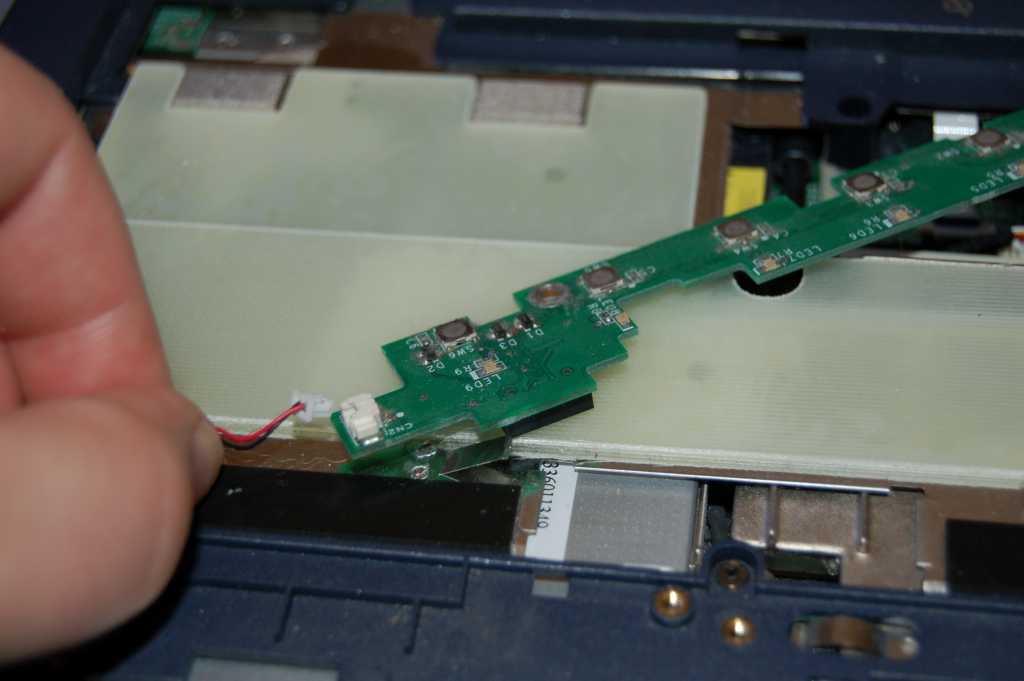
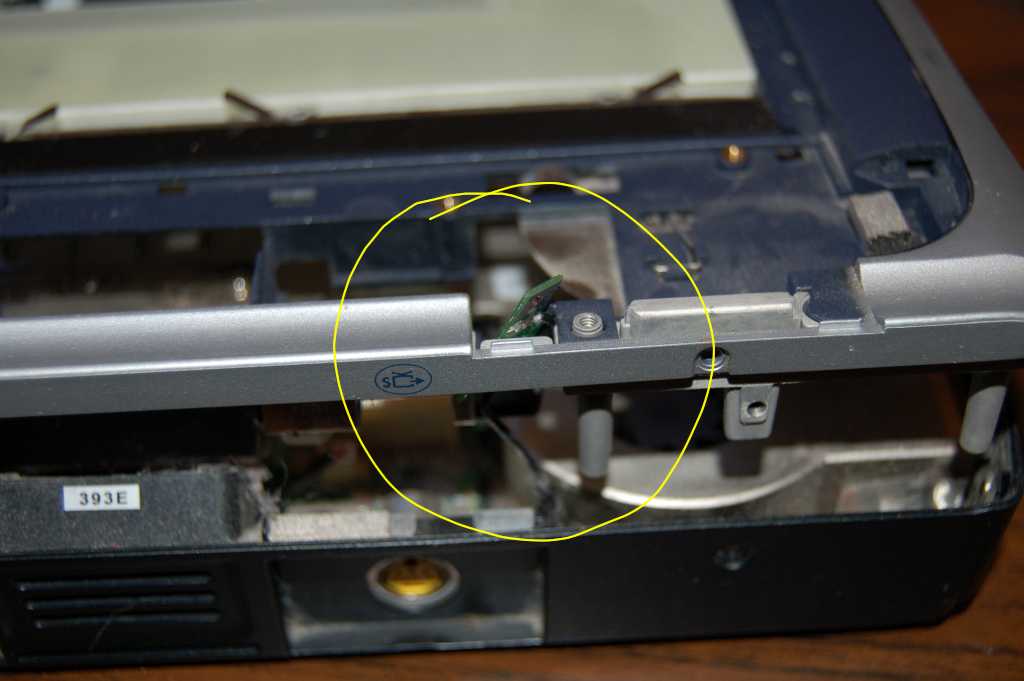
Remove the 2 screws from this mini circuit board.

Then carefully lift up at the attached end to pull it from the socket. Then just detach the wires.
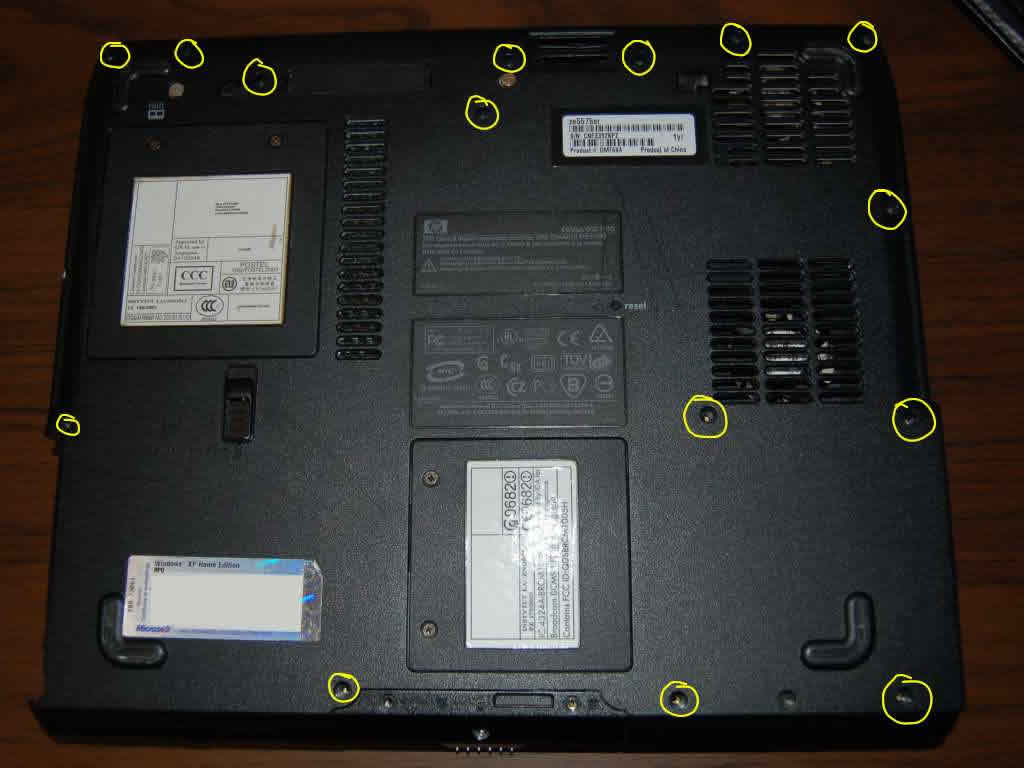
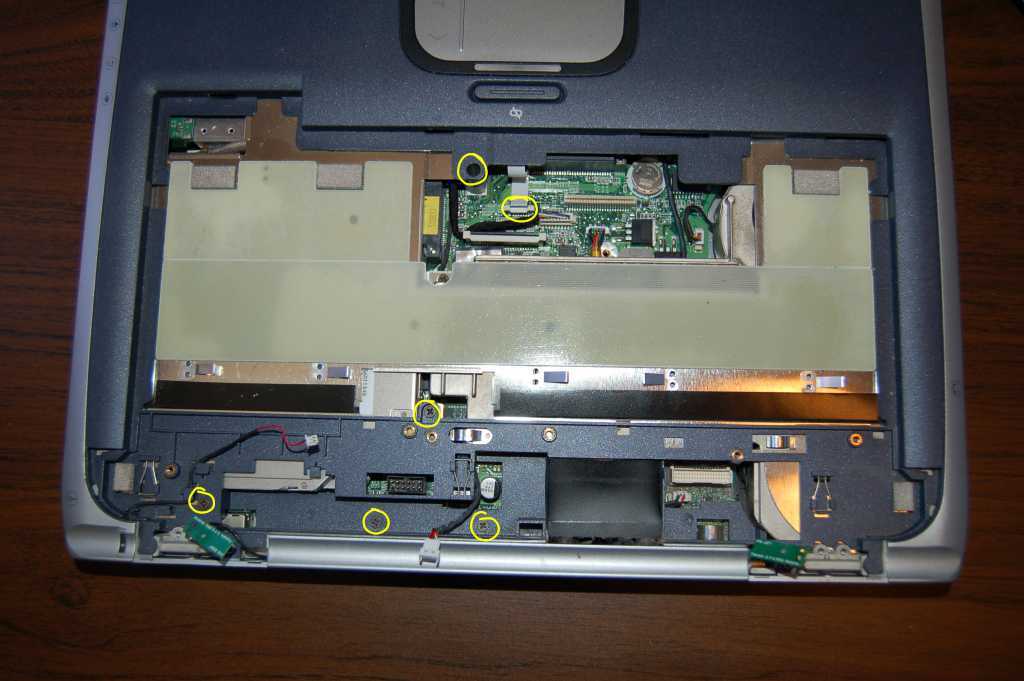
Now lets flip it over carefully and remove the 15 bottom screws.
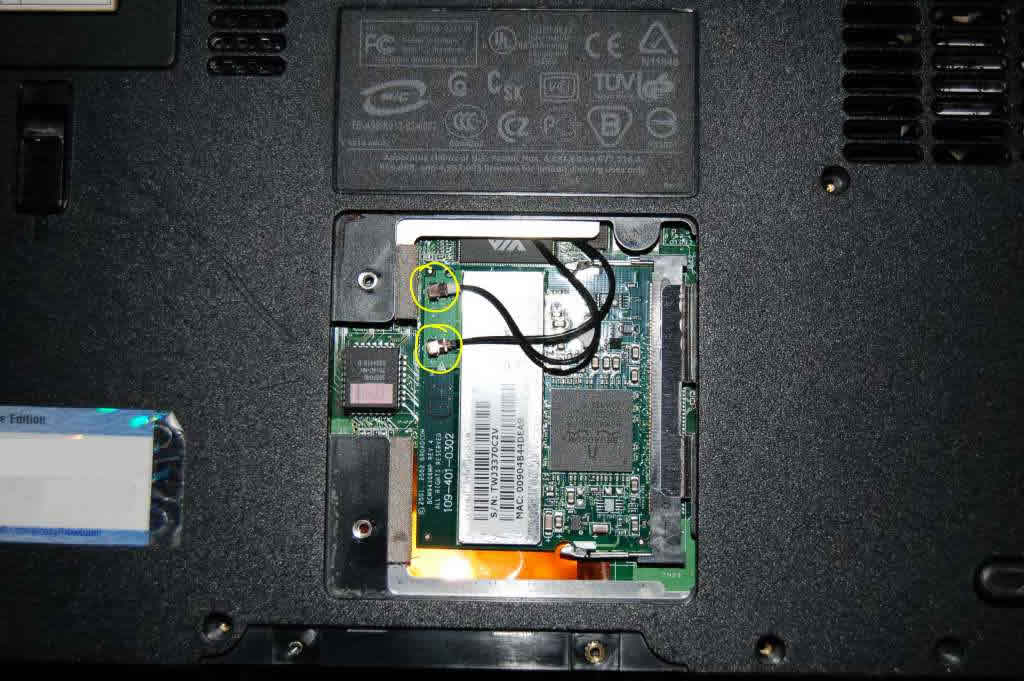
Also we need to disconnect the wi-fi card from the antenna’s. Remove the screws from the cover plate.
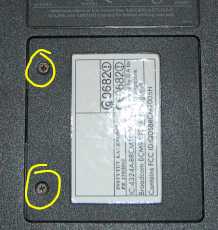
Grab the wires at the plug end. They are like a button snap that snap’s on and off.
Remove the single screw at the battery compartment.
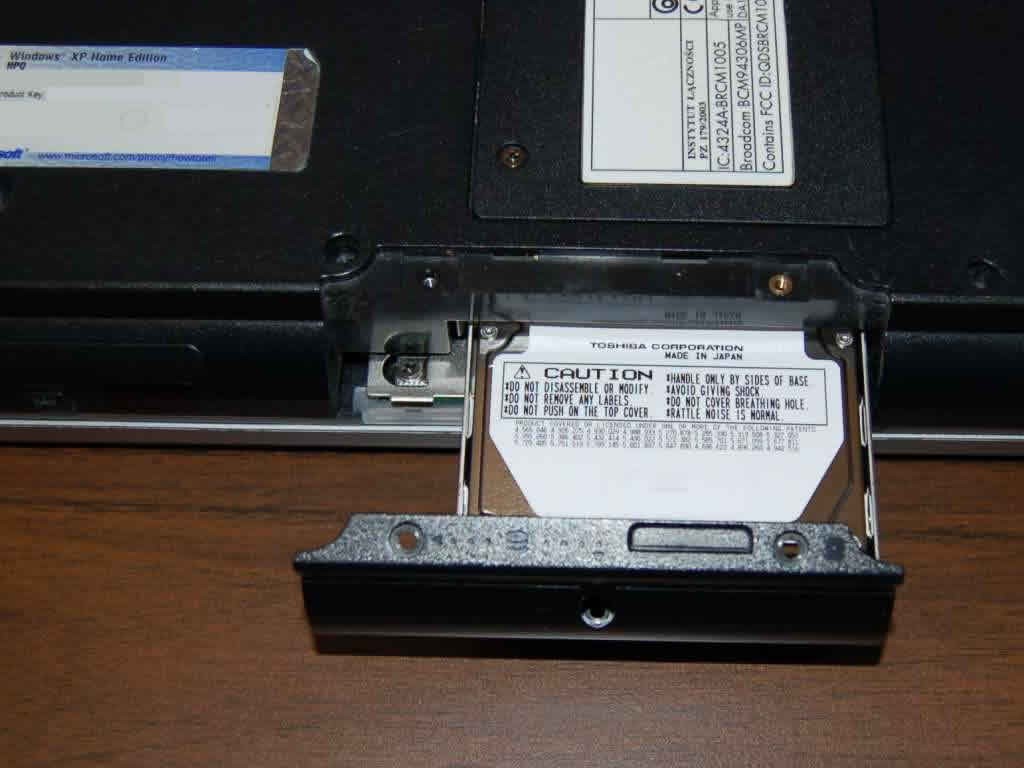
Time to remove the hard drive. There are 3 screws, the center of which is hidden under a rubber plug.
After the screws are removed, you can pull the hard drive out. Keep in mind that at the other end, the hard drive is snuggly plugged into a receptacle and therefore can be a bit tight to get moving, but should pull out easy after the initial start.
Now we flip the laptop over again carefully, and remove additional screws and the touch pad ribbon.
Time to pull the top off. This part can be a bit tricky. First we need to be sure to thread the wi-fi antenna’s through the body, and keeping the front of the laptop as the hinge, we open the top
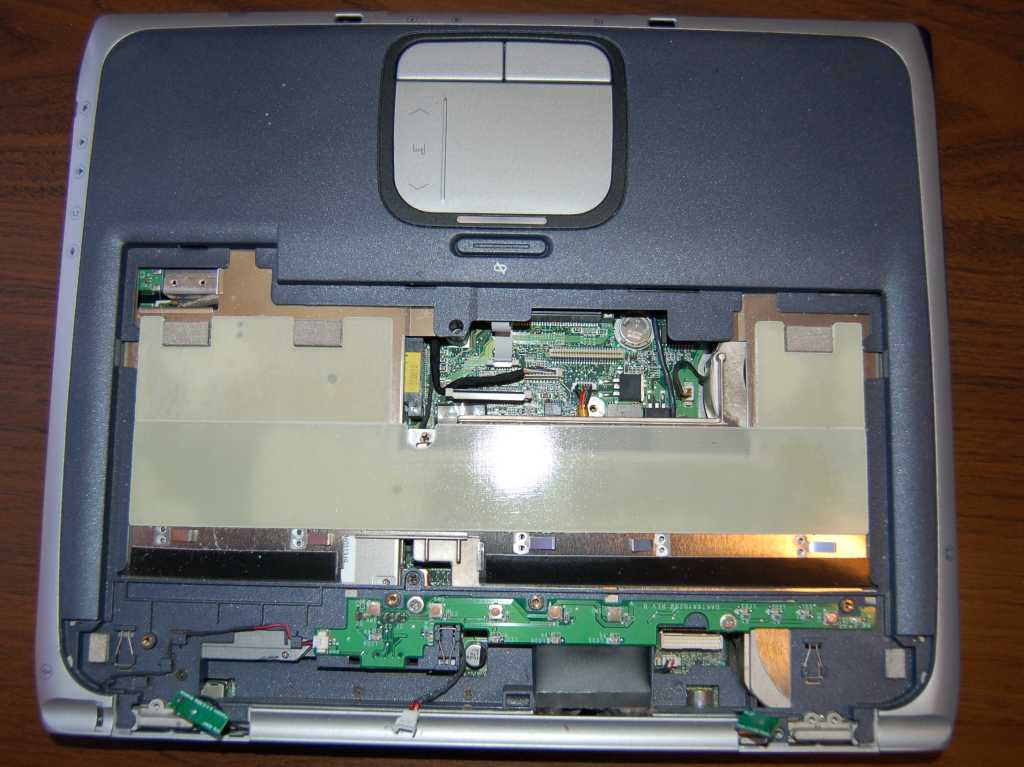
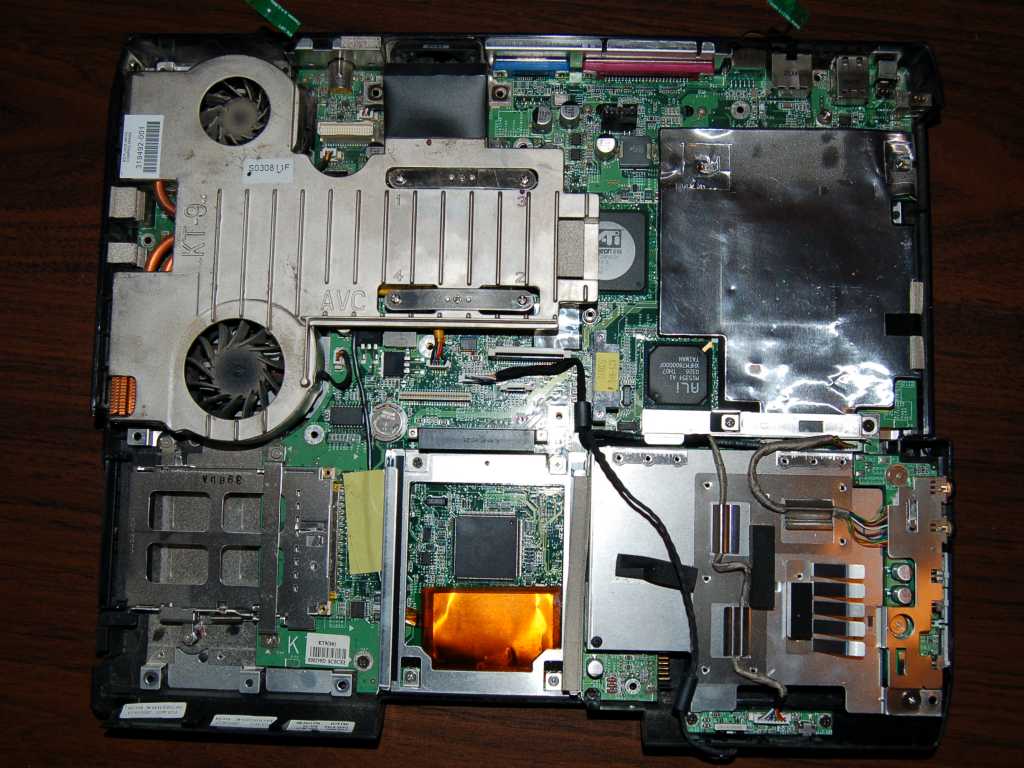
Voil├ , top removed, innards revealed.
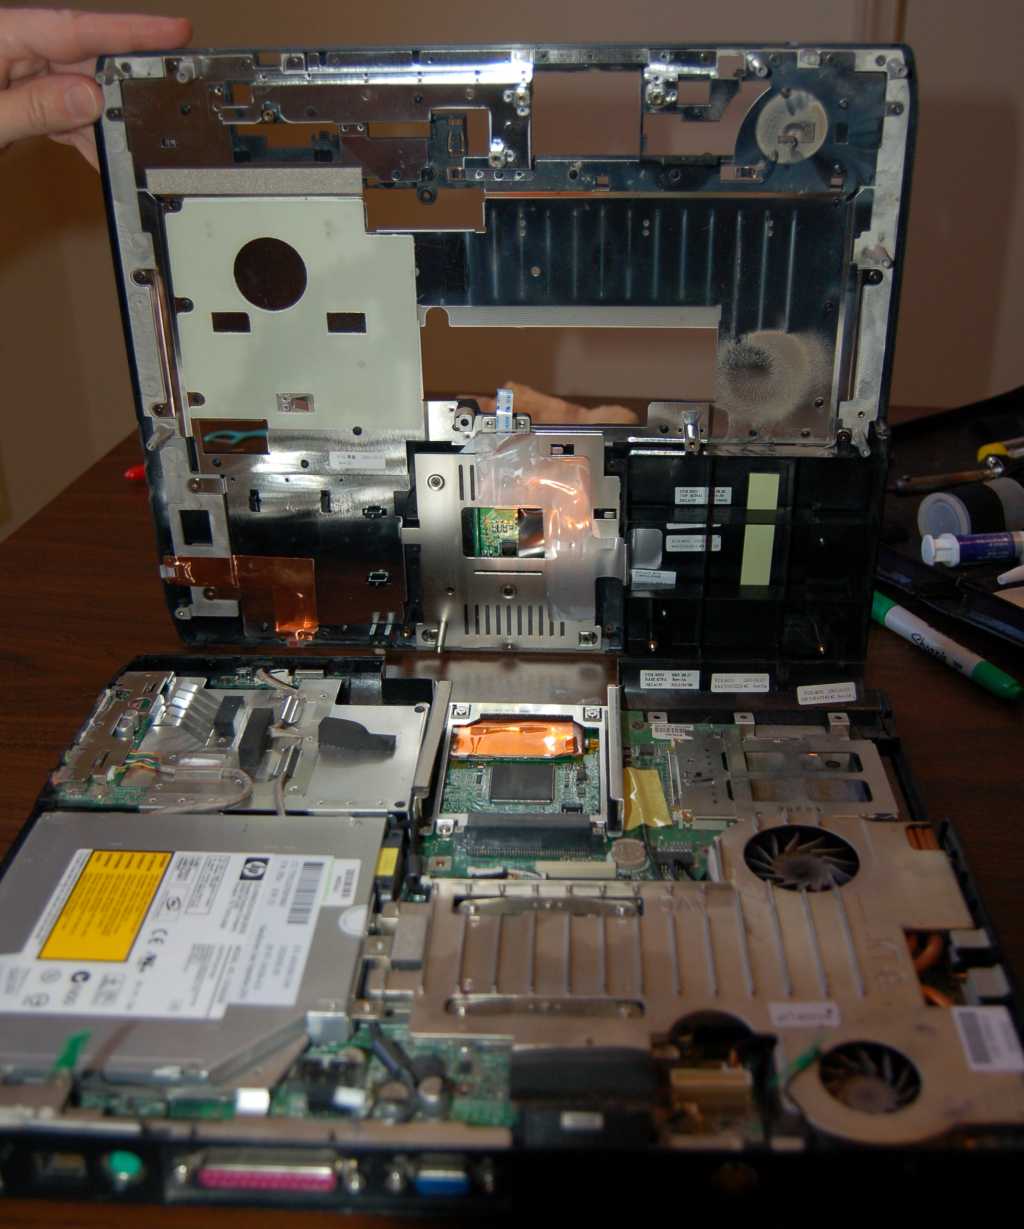
Miscellaneous
CD Drive – No disassembly required: Just pull.
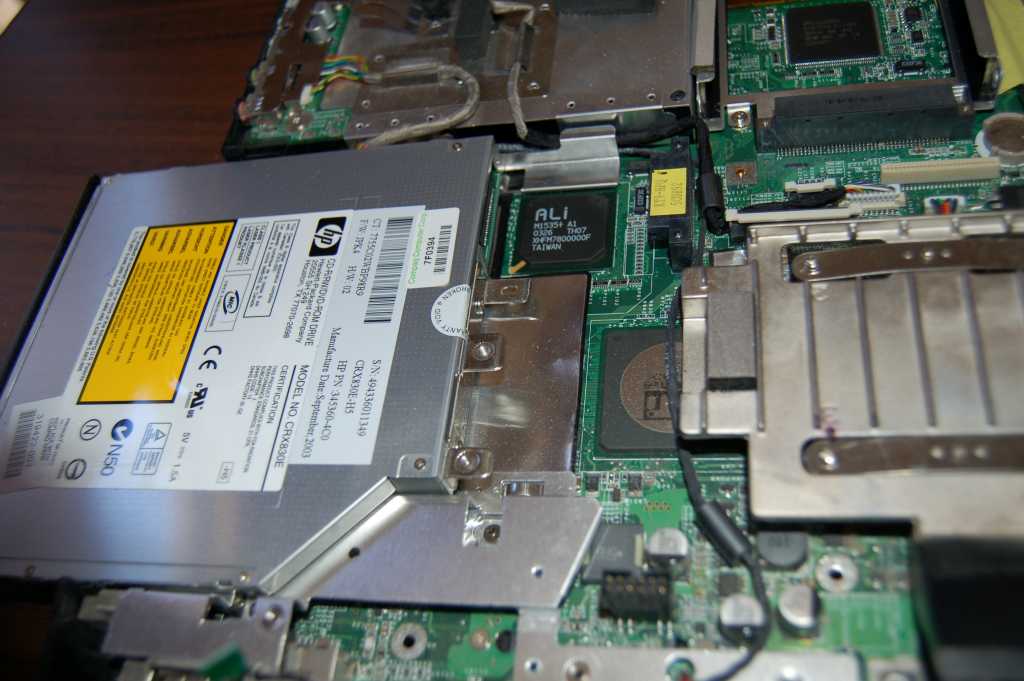
There are the three screws at the top of the cd drive rail.

Then the 4 input plug screws.
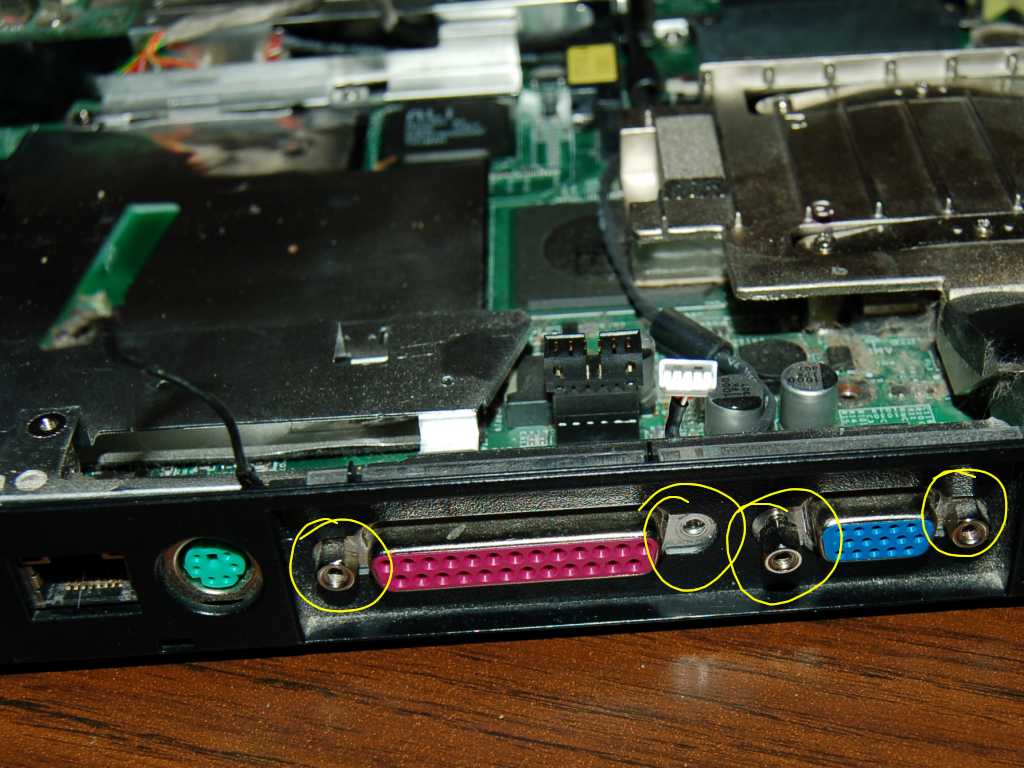
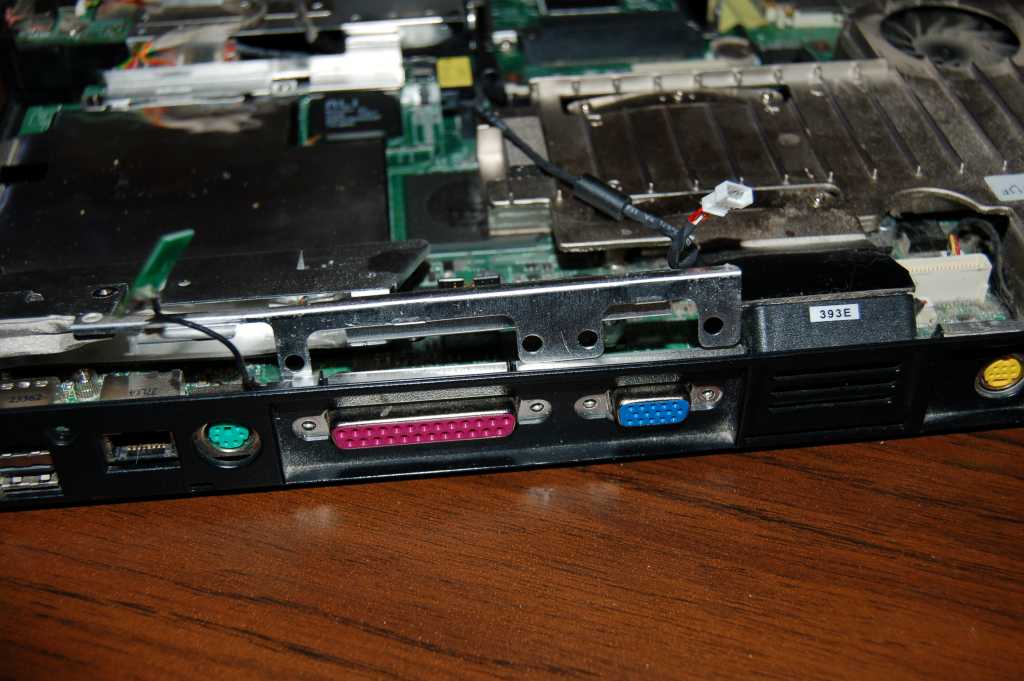
Now you can slide out the drive rail/input cover plate.
Here is where I jumped the gun and pulled some of the motherboard screws before pulling the heat sink. Wishful thinking that I would not need to pull the heat sink (I did not have any thermal compound in my toolbox).
Here are those six screws again from a different angle. If you want to jump ahead and pull the heat sink first, be my guest.
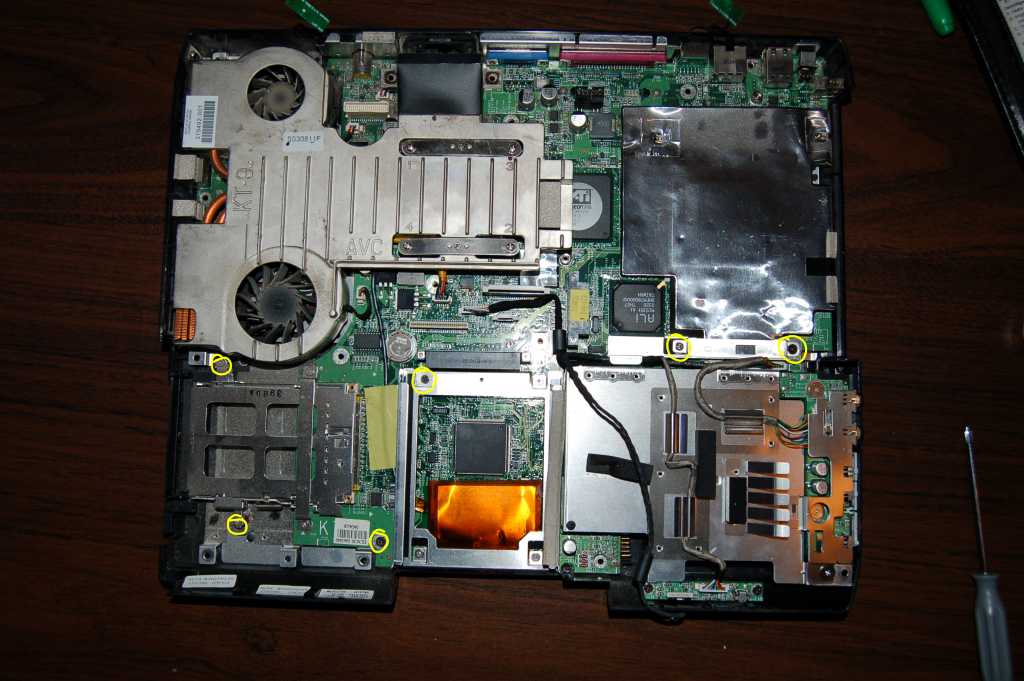
Once those six screws are pulled, you will need to remove the heat sink in order to get to the last two motherboard screws. Don’t forget the wire plug.
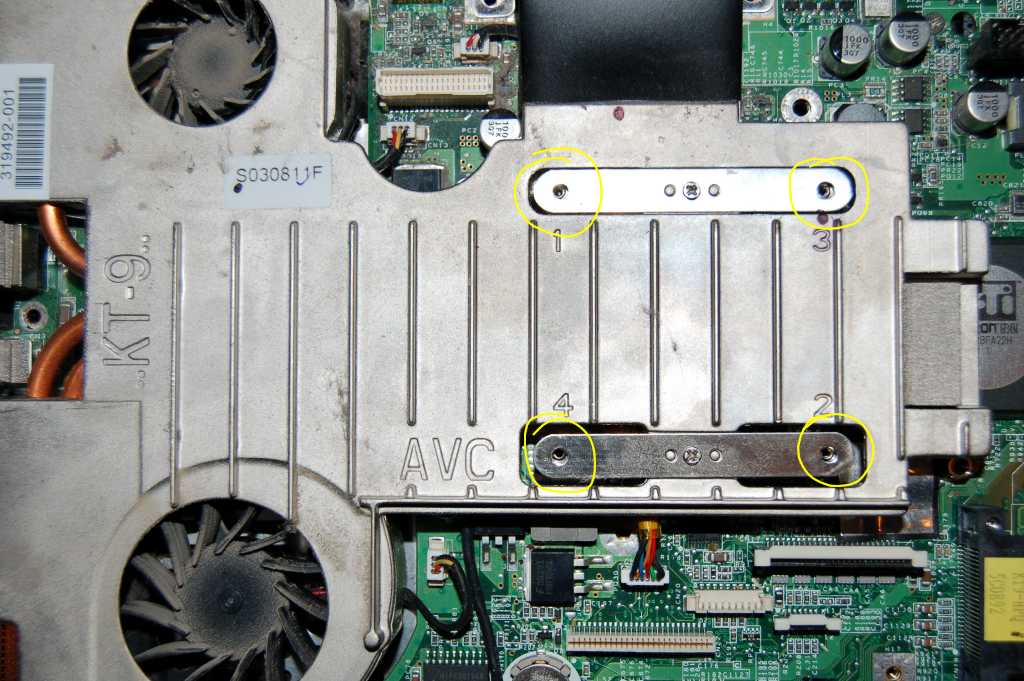
Let’s remove the Heat sink so that we can get to that last motherboard screws.
Pull these 4 screws and then gently pull up the heat sink. There may be a little resistance as the old thermal compound between the heat sink and the cpu gives way.
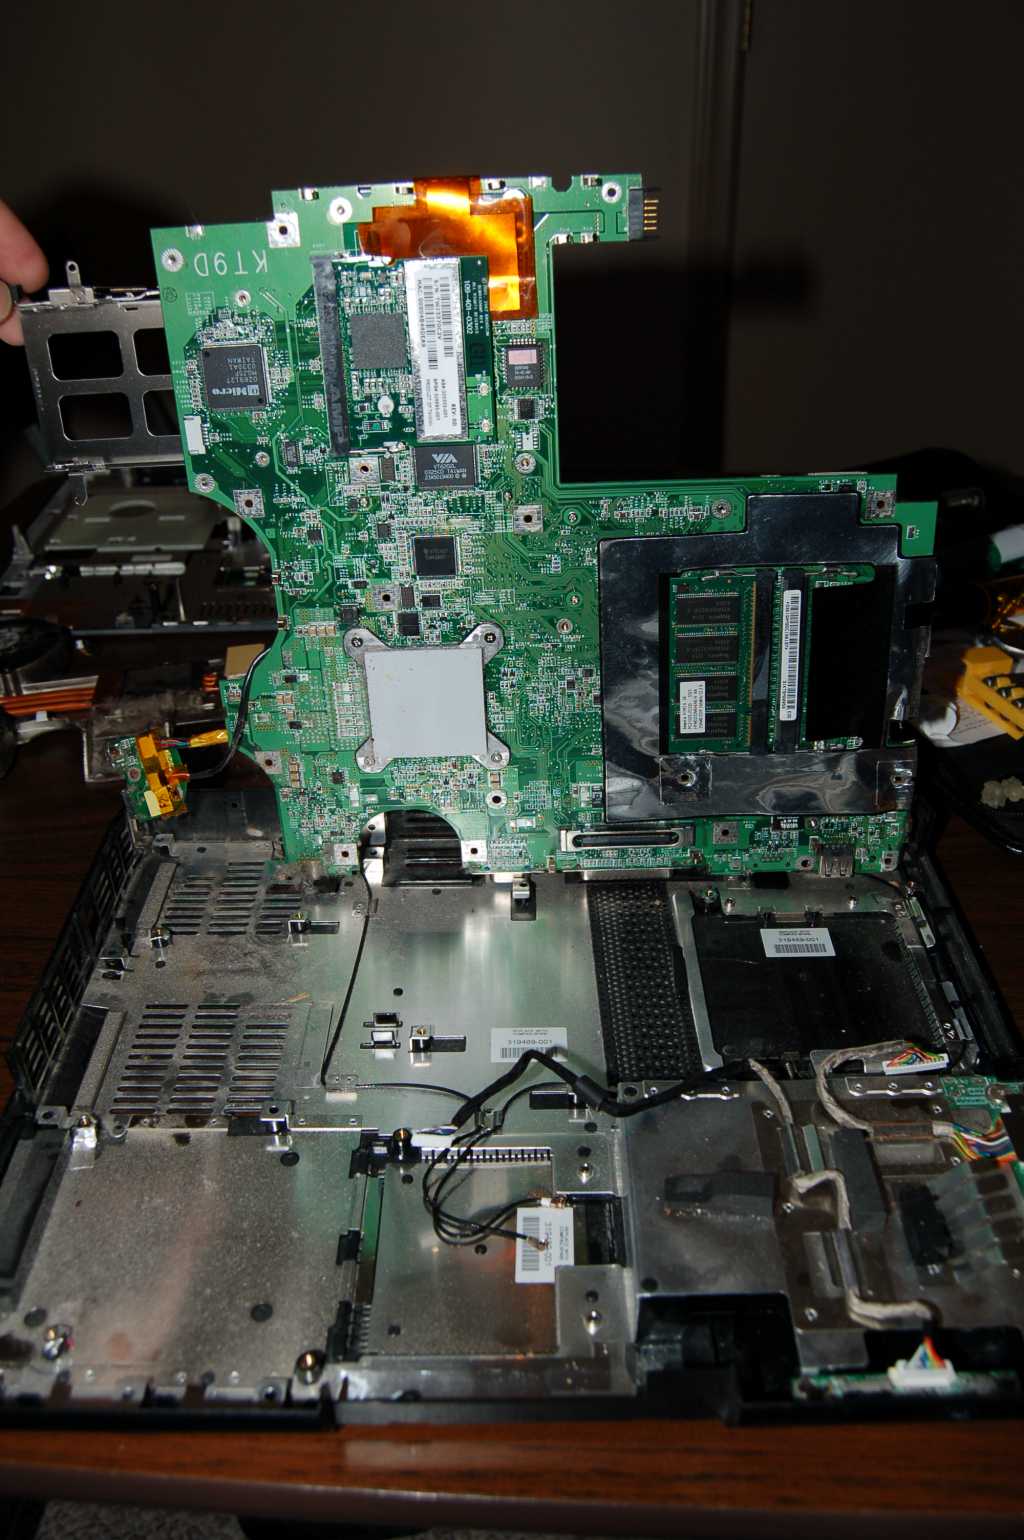
Motherboard
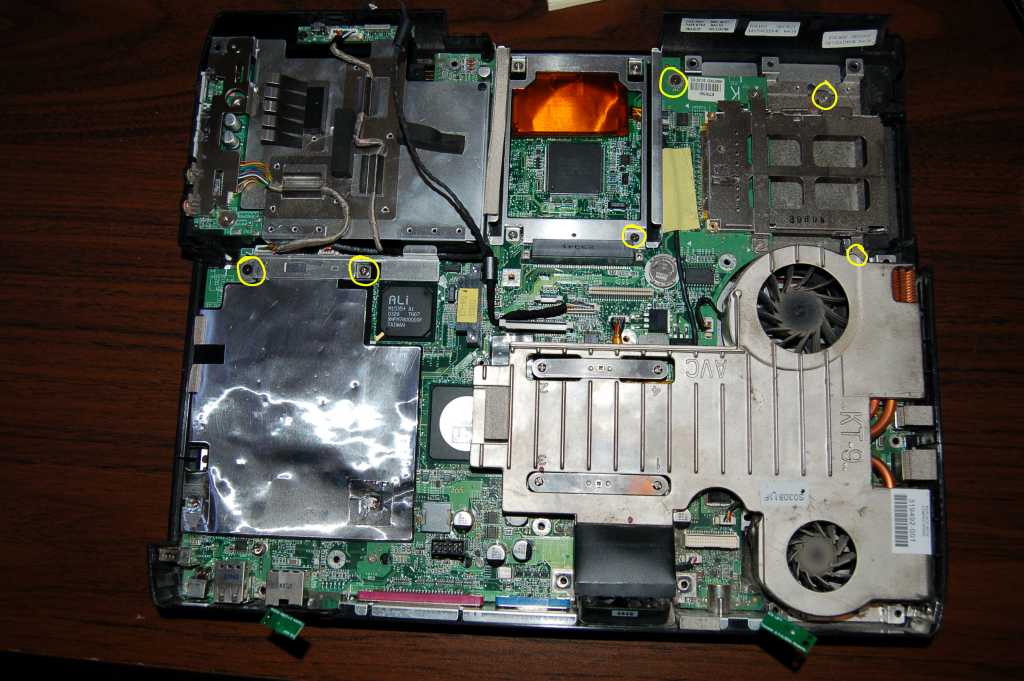
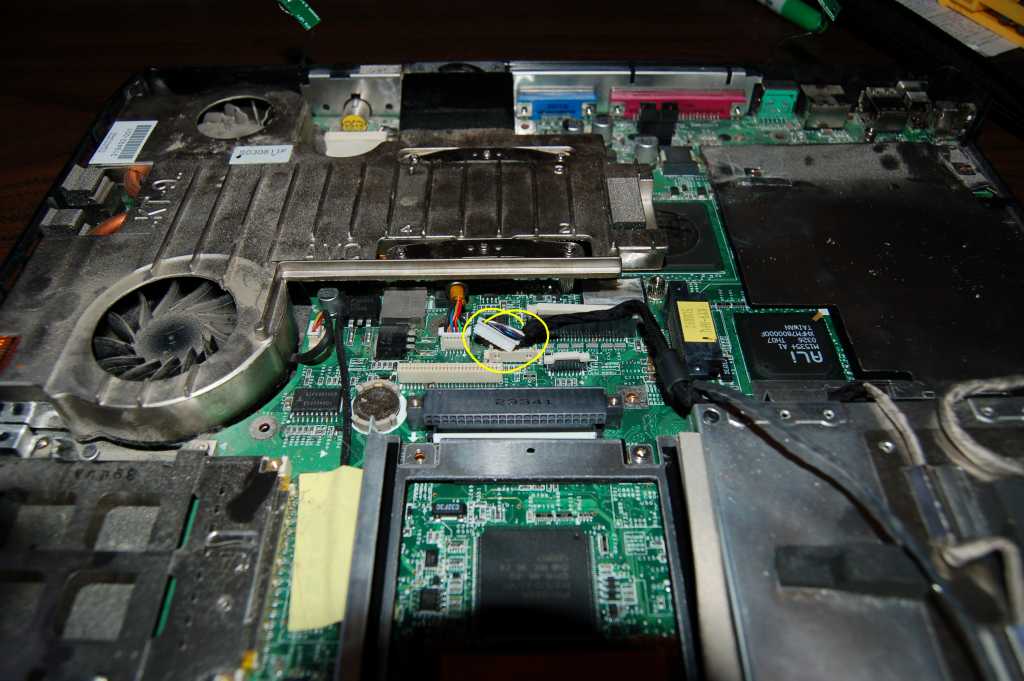
Almost there. Just two more screws and a couple more wire jacks and the motherboard is as good as pulled.

Here are the last two wire jacks

Now you can pull up the motherboard. Again, pull up by hinging at the rear of the unit. This allows you to avoid conflict with the rear input jacks.
Now you can do your thing. My thing was to attempt to remove the left over pieces of the power plug and solder in a new one. After seeing what I had to deal with, I went to my local Radio Shack and picked up a couple coaxial power jacks in size N as that was all they had. Of course this part was not the same as what I had and some jerry rigging ensued.
One last word of advice. DO NOT FORGET THE THERMAL COMPOUND when putting it all back together.


BRAVO! Thank you very much!
Glad my efforts to document it did not go unused. Thank you for using it!
Just wanted to say thanks!! I was going nuts taking this thing apart till i seen your guide! Most appreciated!
Excellent! I am glad it is still of some use! I will be taking apart my TX2000 in a few days as I am getting the known overheating issue where the wireless is not working.
“Outstanding, your instructions were clear and concise! Now this is “”Cyberfunky””. Gigathanks!! w00dee”
“Very grateful for your clear, copious explaination. Well done.”
Excellent! Glad you made use of it.
Thank you sooooooooooooooooo much for posting this. I appreciate all the time you took to show everyone this great tutorial. Thanks again!
thanks..now i will know how to disasemble my laptop
Very well done! Thank you for this helpfull document. Your efforts will never go unused!!